RockREMOTE Installation
Power Connection
RockREMOTE is powered by a DC supply providing between 10 and 30v and should be capable of delivering a maximum of 5amps and 10v.
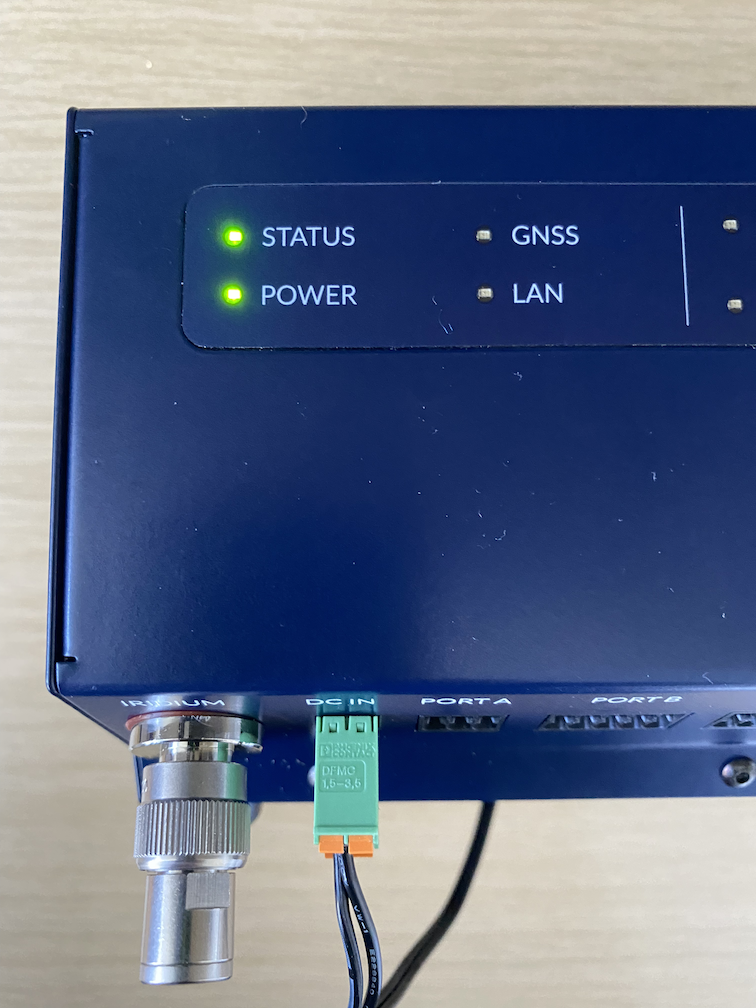
The power supply should be connected to the power cable provided (or to an appropriate alternative) and connected to the RockREMOTE device via the supplied 2-way pluggable terminal block connector.
Viewed from the front with the connector plugged in place the top left is the positive connection and the bottom left is negative.
Installing SIM cards
RockREMOTE comes with an Iridium Certus SIM card pre-installed as standard.
A Cellular SIM card can also be pre-installed if required.
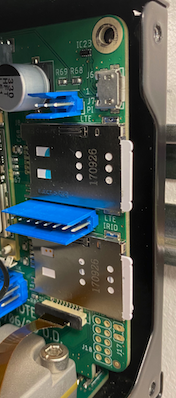
Should access be required to remove or install a Cellular or replacement SIM the following steps should be taken:
- Unscrew the 5 screws on the right hand end panel using a 2.5mm socket head screw driver
- Locate the required SIM card
- The Cellular SIM is at the top
- The Iridium SIM is at the bottom
- To remove an existing SIM push the SIM inwards to release via the spring loaded mechanism
- To insert a new SIM, orientate the SIM card correctly and insert it in against the spring loaded mechanism and release
- Once inserted re-attach and secure the panel before connecting or powering the device
RockREMOTE is compatible with mini (2FF) size SIM format
Mounting RockREMOTE
RockREMOTE should be installed indoors in a secure environment or in an environmentally secure container and should be kept away from liquid, excessive dust and humidity during its normal operation.
For initial set up purposes, RockREMOTE can be placed on a desk using the 4 rubberised feet to prevent it from slipping during use.
For operational purposes it is recommended that RockREMOTE is securely attached as follows.
The RockREMOTE comes with two, inline top hat DIN rail clips allowing you to easily secure the device to a IEC/EN 60715 DIN rail.
Ideally, when installed and viewed from the front, the device should have 100mm of free space from the right side panel to allow access to the Iridium and Cellular SIM cards.
The RockREMOTE should be mounted in a clean and dry location protected from water and excessive dust, corrosion fumes and direct sunlight.
Sufficient ventilation is required for the passive cooling of the device to function correctly.
Connecting The Antenna and Power
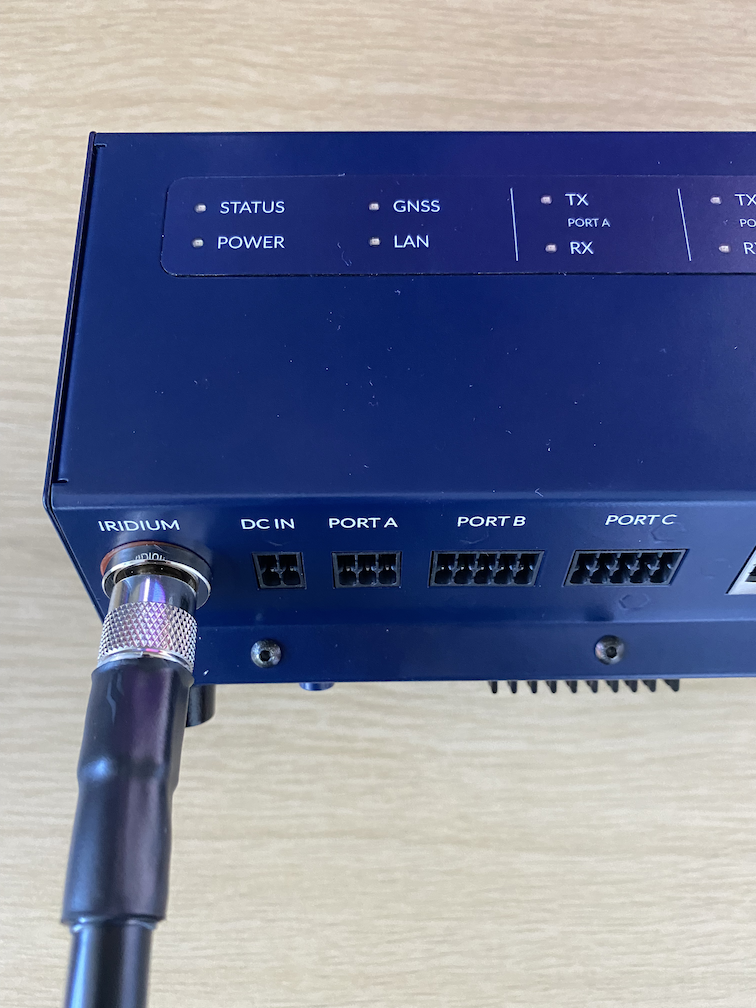
Step 1 - Connect the Antenna Cable
Ensure that the Antenna cable is securely connected using the provided Connector.
If the device is being set up prior to installation it is recommended that a 50 Ohm RF terminator is attached to the Iridium antenna connector prior to the device being powered up
Note that in order to comply with the Iridium certification the antenna must be mounted at least 1 metre above the ground or at least 1 metre above any metallic surface that could act as a ground plane.
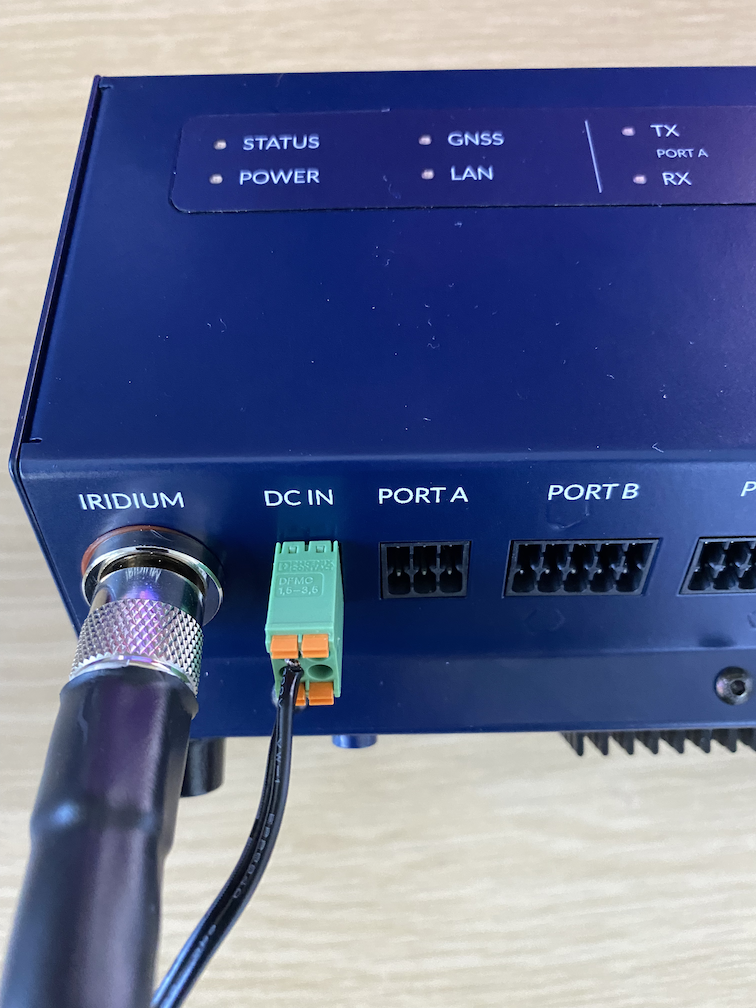
Step 2 - Connect the Power Cable
Insert the 2-way terminal power connector into the DC IN port on the device as shown below and then switch on the power.
Step 3 - Powering Up

DC In
| Pin | Description |
|---|---|
| 1 | ← +10V to + 30V |
| 2 | ← 0V |
| 3 | ← Sleep |
| 4 | N/C |
The POWER LED will show as soon as the power is switched on.
The STATUS LED will flash for approximately 1 minute as the device starts up. Once Start-up is complete the STATUS LED will stop flashing and become solid.
On the 1st ever Start-up sequence, no other LEDs will display unless a physical LAN cable connection has been pre-established to the device.