Cloudloop Device Manager Operation
Getting started with CDM - Basic Functions & Features
This section will help you navigate through the various functions and access useful features within CDM. You will know the URL to login into the platform, how to access helpful functionalities such as, downloading service logs that are beneficial when raising support tickets, viewing your device location and other valuable features. Follow the below information to help you get started with CDM.
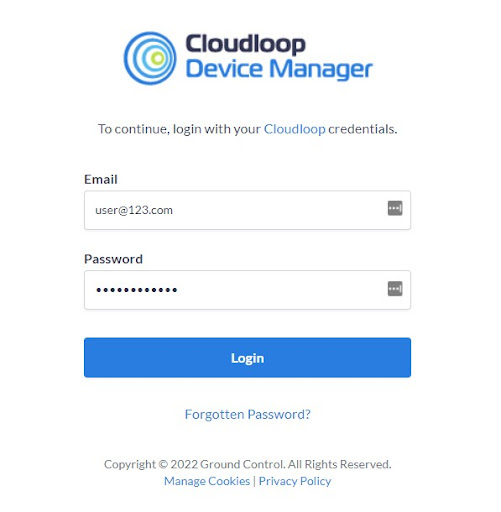
Type in or copy the following URL in your browser bar to access CDM:
You will be directed to the main login page.

- Login using your credentials provided by the Ground Control support team.
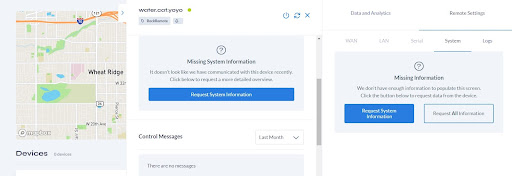
At the start you might not see the system information for your RockREMOTE terminal in CDM (see image below).
To get the full benefits of CDM, you need to ensure that you obtain the most up to date system information for your RockREMOTE terminal so that the data is populated within the platform and it is visible to you via the Dashboard. Please carry out the following activity:
- Ensure that your RockREMOTE terminal is switched on and connected to the Iridium satellite network.
- Login to your CDM.
- Once you are in CDM, click on your terminal from the list presented to you (see below image):
- Text boxes will appear that are titled “Missing System Information” or “Missing Information” (see below images).
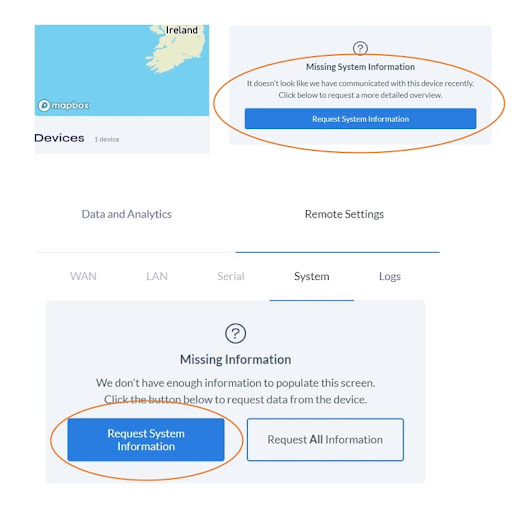
- In order to obtain the RockREMOTE system information, please click on the “Request System Information” boxes (see above image).
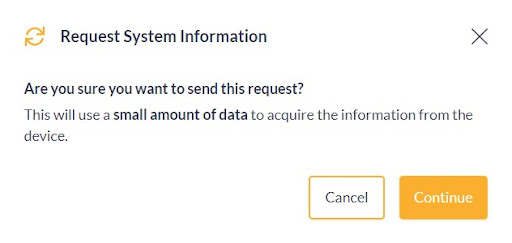
- A pop-up message will appear warning you that there will be usage of the Iridium satellite data allowance with this action. You would need to decide if you want to go ahead.
In order to receive the full benefits of CDM, it is advantageous to obtain the latest system information.
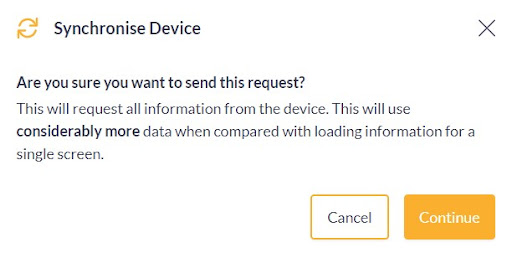
- You can also click on the “Request All Information” box (see below):
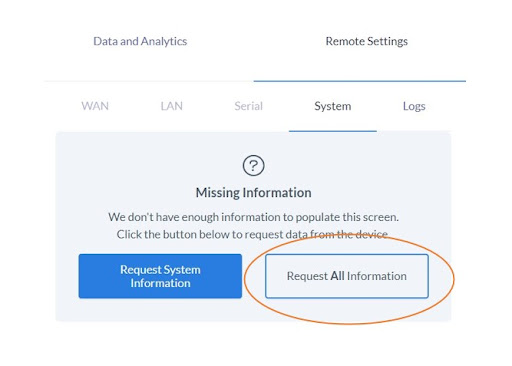
- To obtain the full RockREMOTE system information, please click on the “Request All Information” box (see above image).
- A pop-up message will appear warning you that there will be usage of the Iridium satellite data allowance with this action. You would need to decide if you want to go ahead.
In order to receive the full benefits of CDM, it is advantageous to obtain the latest system information.

Once you have all the RockREMOTE information downloaded onto your CDM, you will be presented with the main dashboard.
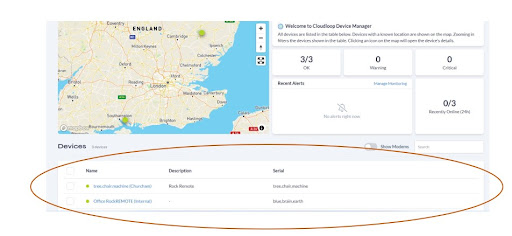
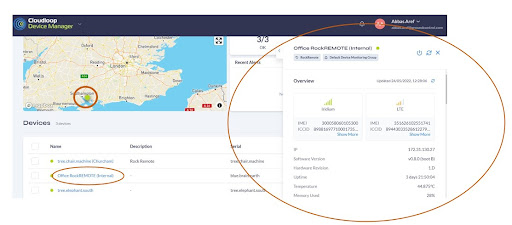
Immediately you will see the familiar map view, a welcome message and any known alerts. At the bottom of the dashboard, you can see your device name and description. If you have more than one device, you will see them in the table view below.
- RockREMOTE terminals with a known location are shown in the map view (the green circle icon represents the device).
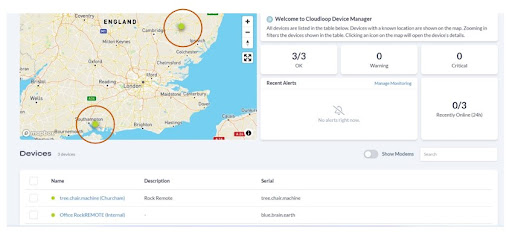
- CDM enables you to navigate to the terminal you are interested in. Click the green circle on the map, or one of the devices in the table, you will see the RockREMOTE details page on the right.
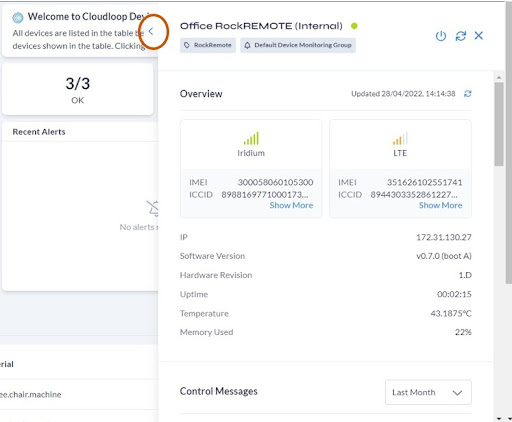
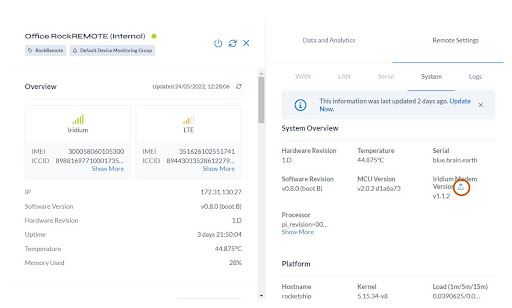
- You can expand the details page by clicking on the blue arrow (see below). This action will enable you to view all of the details available for your RockREMOTE unit.
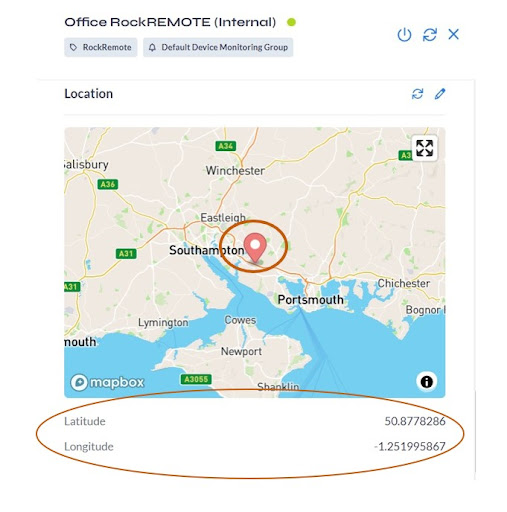
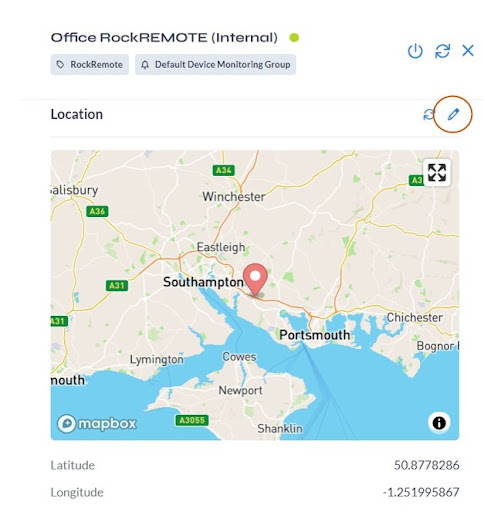
The position of the device can be seen in the location section at the bottom of the system information page. The terminal site is shown as a marker in the map view as well as its latitude and longitude.
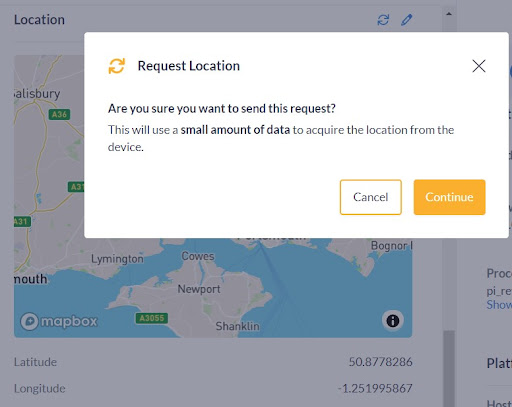
- CDM provides you with the feature of obtaining the latest location information by clicking on the “Get Location” button circled below:
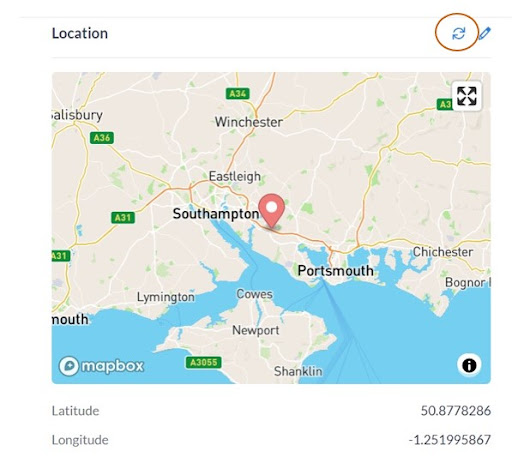
- A pop-up message will appear warning you that there will be usage of the Iridium satellite data allowance with this action. You can decide if you want to go ahead.
In order to receive the full benefits of CDM, and making sure that your RockREMOTE terminal is still in its physical location, it is advantageous to obtain the most up to date position of the terminal.
- You can also manually update the location of the terminal by clicking on the edit location button (see pencil icon below).
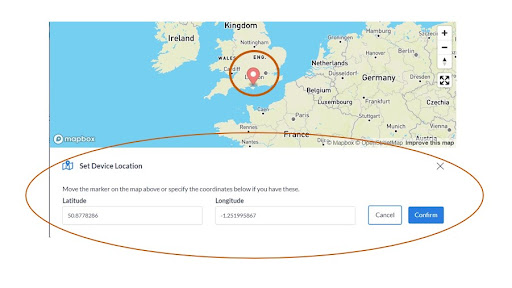
- You can manually update the location information. either move the marker on the map to another position or update the latitude and longitude data in the boxes (see below). If this action is done by mistake, you can click on the “Request Location” button and CDM will show the original position.
- You can click on the synchronise button (see image below) to get the latest RockREMOTE system information.
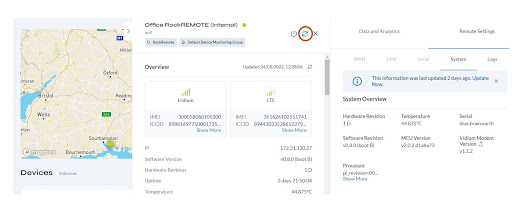
- When clicking on the synchronise button, a pop-up message will appear warning you that there will be usage of the Iridium satellite data allowance with this action. You can decide if you want to go ahead.
It is advantageous to obtain the most up to date terminal system information.
- Another useful feature of CDM is that you can obtain the full history of the interaction between CDM and the RockREMOTE terminal via the Control Messages section. Select the time frame and the information will be displayed automatically. If there is no interaction between CDM and the RockREMOTE terminal (for that timeline), no data will be shown.

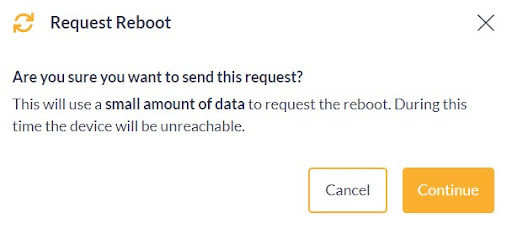
- You can conduct a hard reboot of your RockREMOTE terminal via CDM by clicking on the reboot button. This is a useful feature as the action could fix any small issues experienced.
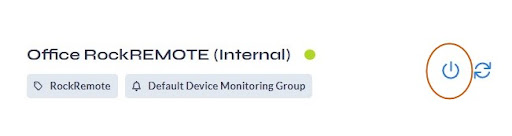
- When clicking on the reboot button, a pop-up message will appear warning you there will be usage of the Iridium satellite data allowance with this action and that the device will be unreachable during the reboot time. You can decide if you want to go ahead.
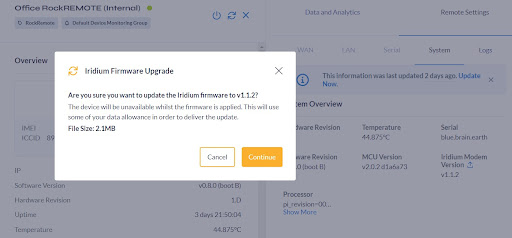
- CDM enables you to update the Iridium modem firmware remotely. This can be initiated by clicking on the upgrade icon shown below. A useful feature, especially if the firmware update is essential.
- When you click on the firmware update button, a pop-up message will appear warning you that there will be usage of the Iridium satellite data allowance with this action and also the device will be unavailable whilst the firmware is applied. You can decide if you want to go ahead.
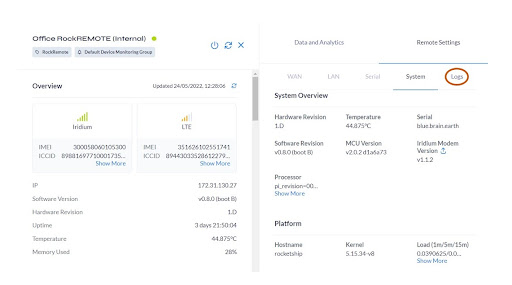
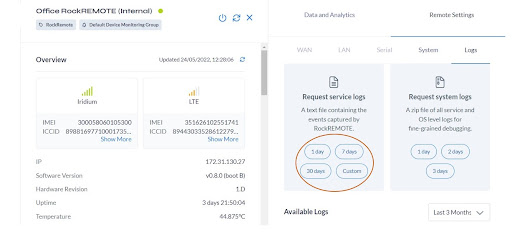
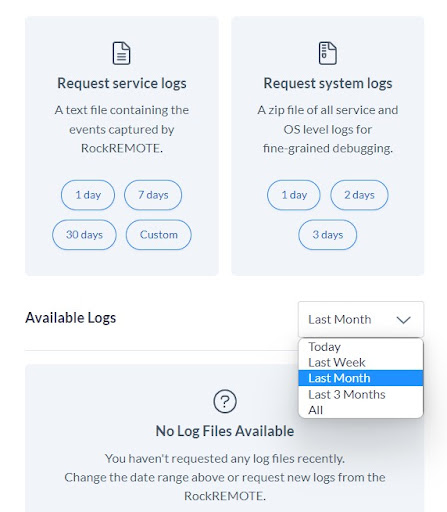
- You can access the service and System logs by clicking on the logs tab (see below). This is an extremely valuable tool to have because it helps with troubleshooting issues experienced.
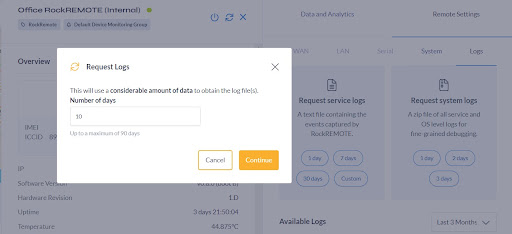
- Service and system logs are text files containing captured events by the RockREMOTE terminal. You can select different time frames, or you can even customise the timeline to suit your circumstances.
- A pop-up message will appear warning you that there will be usage of the Iridium satellite data allowance with this action. You can decide if you want to go ahead.
Logs are valuable because you will obtain useful information from them to allow for basic troubleshooting to be conducted. Also, support engineers can help fix issues quickly if they have access to system and service logs.
- Downloaded logs are stored in the “Available Logs” section (see below). This feature enables you to choose the timeframe of available logs. Once you click on a timeframe, and the log file is visible, you can download it to your local computer.
Monitoring & Alerts set-up and configuration
CDM enables you to set-up monitoring and alerts for a single RockRMEOTE unit or even multiple terminals. These are valuable notifications that are sent to your email address informing you that your RockREMOTE terminal has stopped transmitting data.
This is a useful function because it enables you to investigate an issue and act quickly to fix it. CDM gives you total control for the configuration and set-up of the monitoring and alerts feature.
Getting started
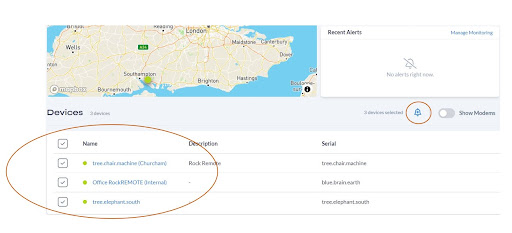
- You will need to select a device by checking the box to the left of each terminal to enable the bell icon with the + sign (see image below) to appear which is the “add to monitoring group” function.
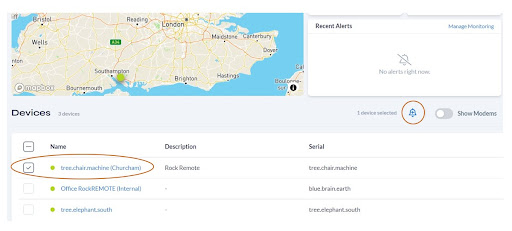
- In addition, and if you have multiple RockREMOTE terminals, you can also select all devices by checking the top box (see image below).
- When clicking on the bell icon, a pop-up window will appear, where you will be able to select “Create Monitoring Group”.
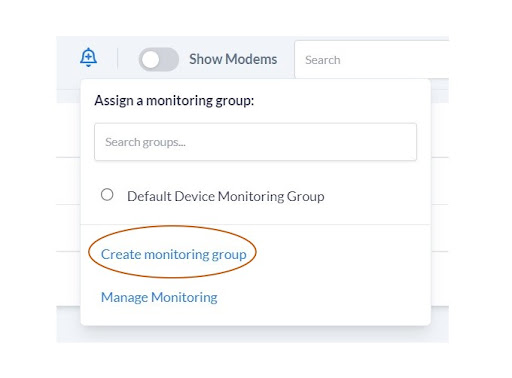
A “Create Monitoring Group” window will appear. This is where you can configure and set up the alerts functionality.
Type in a new name for the group in the top box and then select who needs to be notified in your organisation by typing in their name (these are users activated for the RockREMOTE service in our Cloudloop platform):
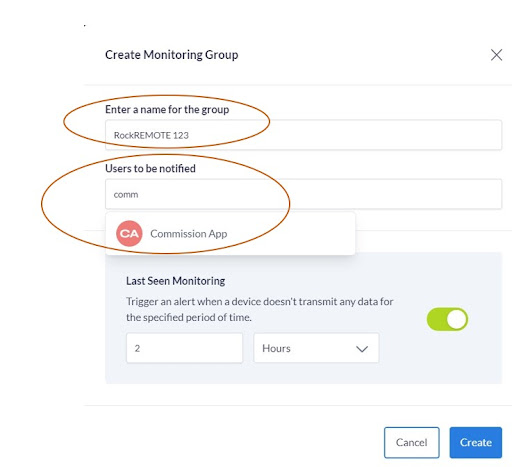
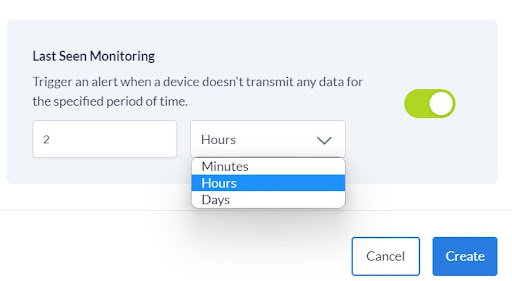
- Set the time frame. This basically enables you to configure when you want to receive an alert based on how long (minutes, hours or days) has the RockREMOTE terminal stopped transmitting its data.
- Click the Create button and the alerts will be set up.
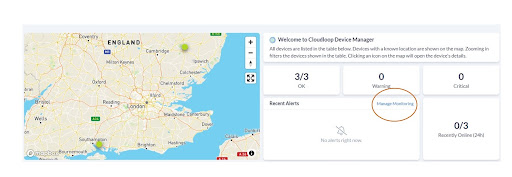
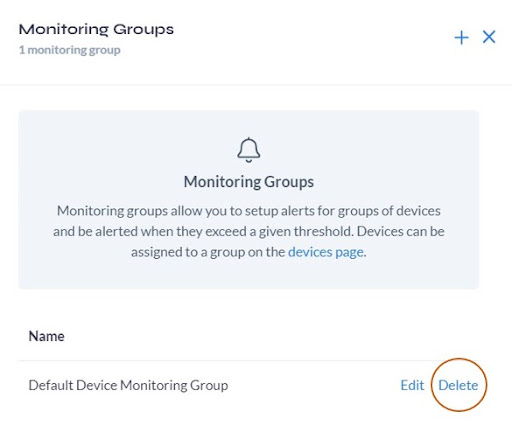
- You can also edit, delete and manage an existing monitoring group by clicking on the “Manage Monitoring” link (see below).
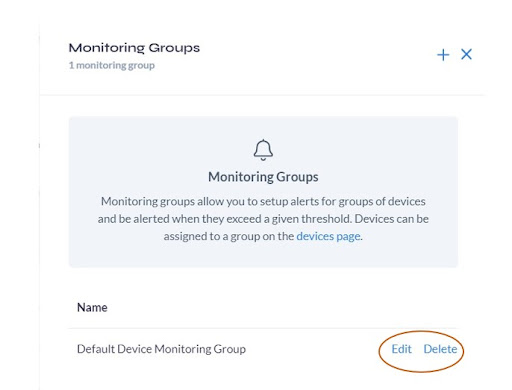
- When clicking on the Manage Monitoring link, a new window will appear. You can edit an existing group, or even delete the group using the corresponding buttons.
- The edit button will take you to the “Update Monitoring Group” page.
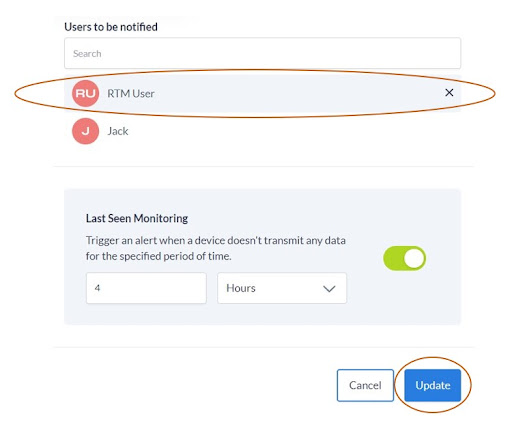
- You can delete users that receive the alerts by clicking on the x icon; this can be someone who is no longer in your organisation. Once this is done, click on the Update button.
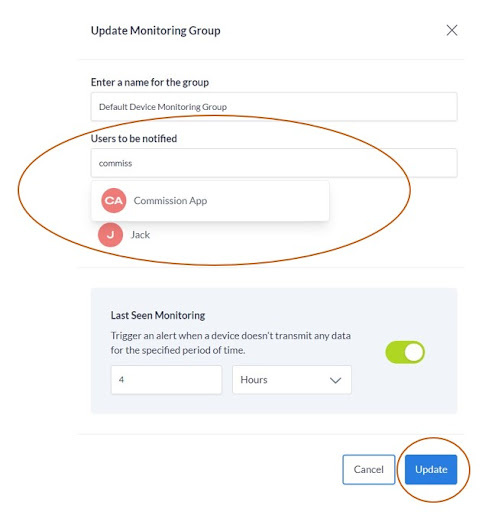
- As an admin operator, you can add additional users to receive alerts. Users must be activated in Cloudloop for the Rockremote service in order to be added to the monitoring group. Once you add a new user, click on the update button.
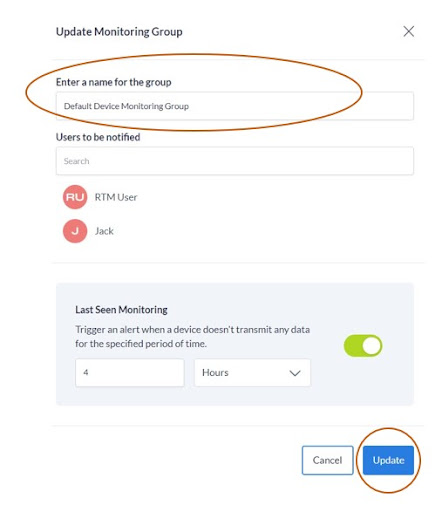
- You can also edit the group name. Once you enter a new group name, click on the update button to make the change.
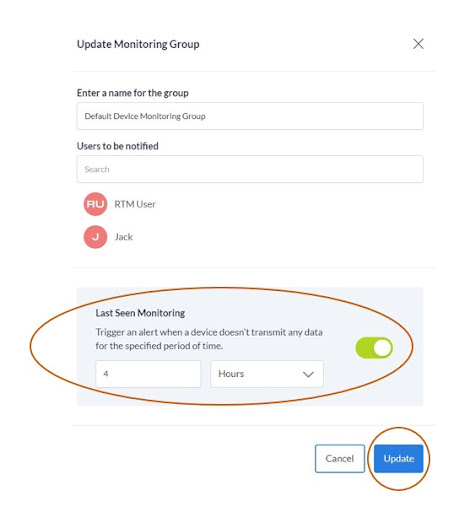
- You can change or edit the time frame for alerts. Click on the Update button to make the change.
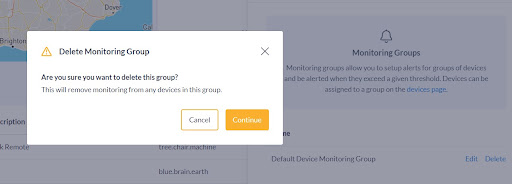
- A user can also remove the monitoring group by clicking on the delete button.
- A pop-up message will appear advising you if you are sure you want to delete the group and that this action will remove monitoring from any devices for this group. You can decide if you want to go ahead.